VSA 10-BMS integration
Introduction
This article explains how to integrate VSA 10 with BMS.
Prerequisites
-
You should have admin access to VSA 10.
-
You should have admin access to BMS.
Field Mappings
| VSA 10 Field | BMS UI |
| Organization | Account |
| Site | Location |
| Name | Name |
| Name | Product Name |
| Type | Category |
| Group | Machine Group ID |
| Last Seen Online | Last Check In |
| Description | OS Info |
| System Name | Computer Name |
| System Manufacturer | Motherboard Manufacturer |
| System Manufacturer | Manufacturer |
| System Model | Model Number |
| Operating System Name | OS Type |
| Operating System Serial Number | Motherboard Serial Number |
| Operating System Serial Number | Serial Number |
| Operating System Version | Major Version + Minor Version |
| Operating System Last Logged On User | Login Name |
| Operating System Last Logged On User | Last Login Name |
| Operating System Last Bootup Time | Last reboot |
| Asset Disk Name | Drive |
| Asset Disk Free Percentage | Free MBytes (calculated) |
| Asset Disk Total Value | Total MBytes (calculated) |
| IPs | IP Address |
| MAC | Mac Address |
| Memory Total | Max Memory Size |
Steps
Do the following on the VSA 10 side:
-
Go to VSA > Integrations > BMS Integration.
-
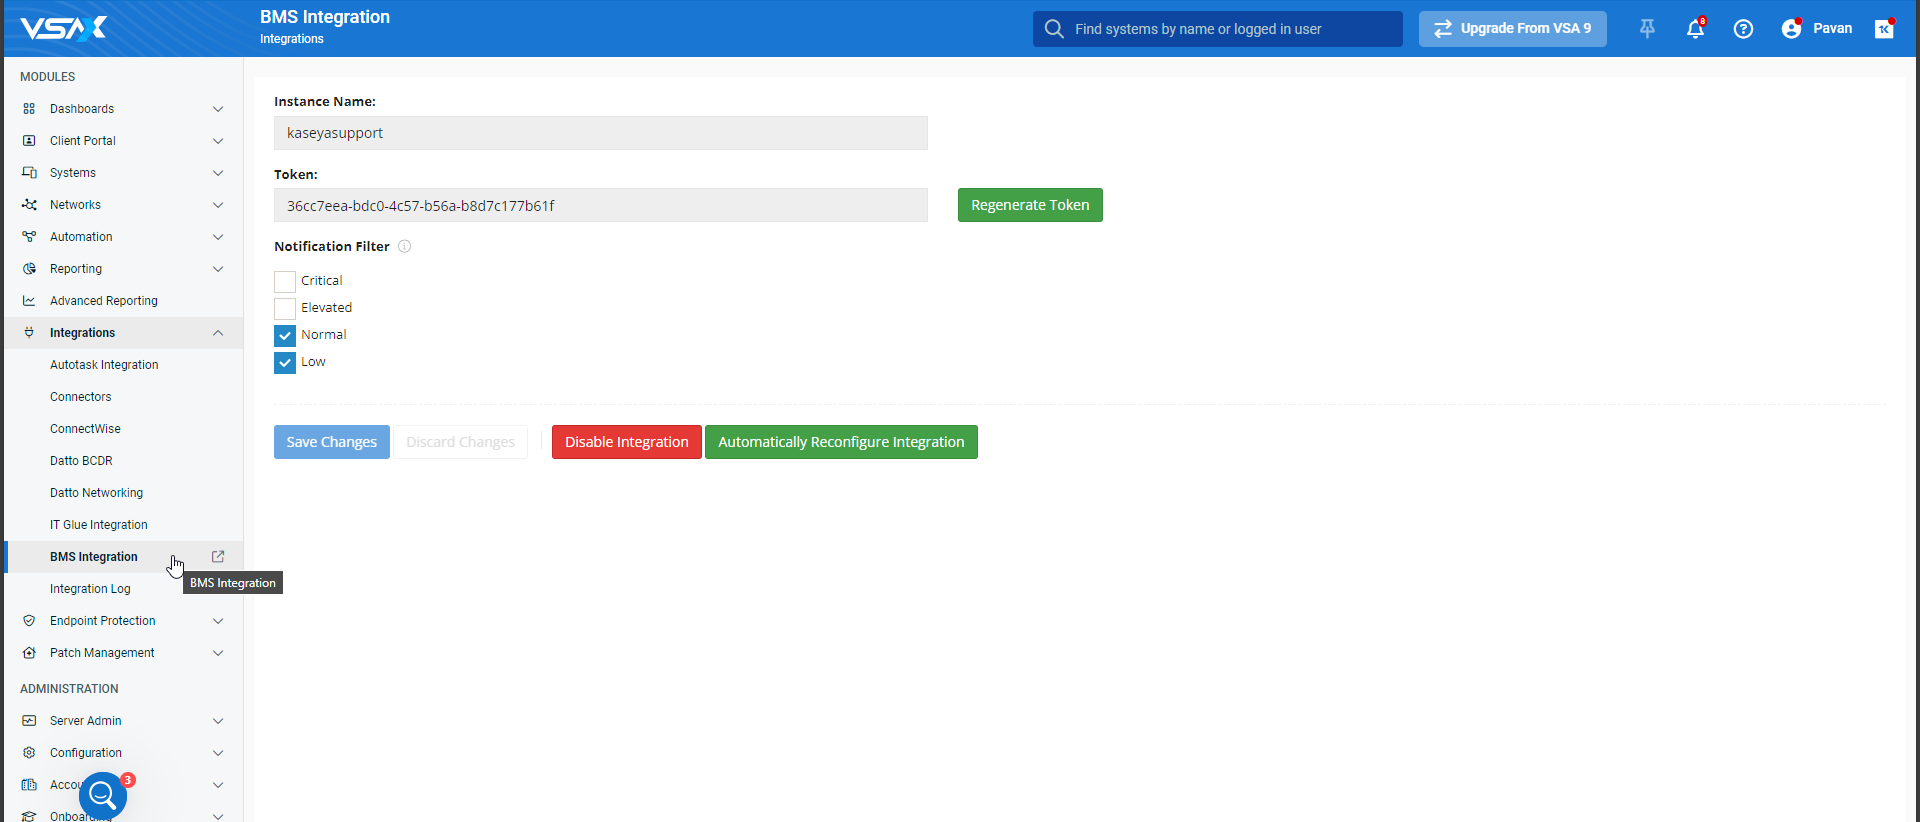
Click Enable Integration. A page appears with the instance name and a token with four filters on - Critical, Elevated, Normal and Low.
-
Notification Filter: Uncheck or check whatever options you require. Once you check these notification filters, they will automatically create a BMS ticket with relevant information.
-
Copy the token to a notepad.
-
Click Save Changes.
Do the following on the BMS side:
-
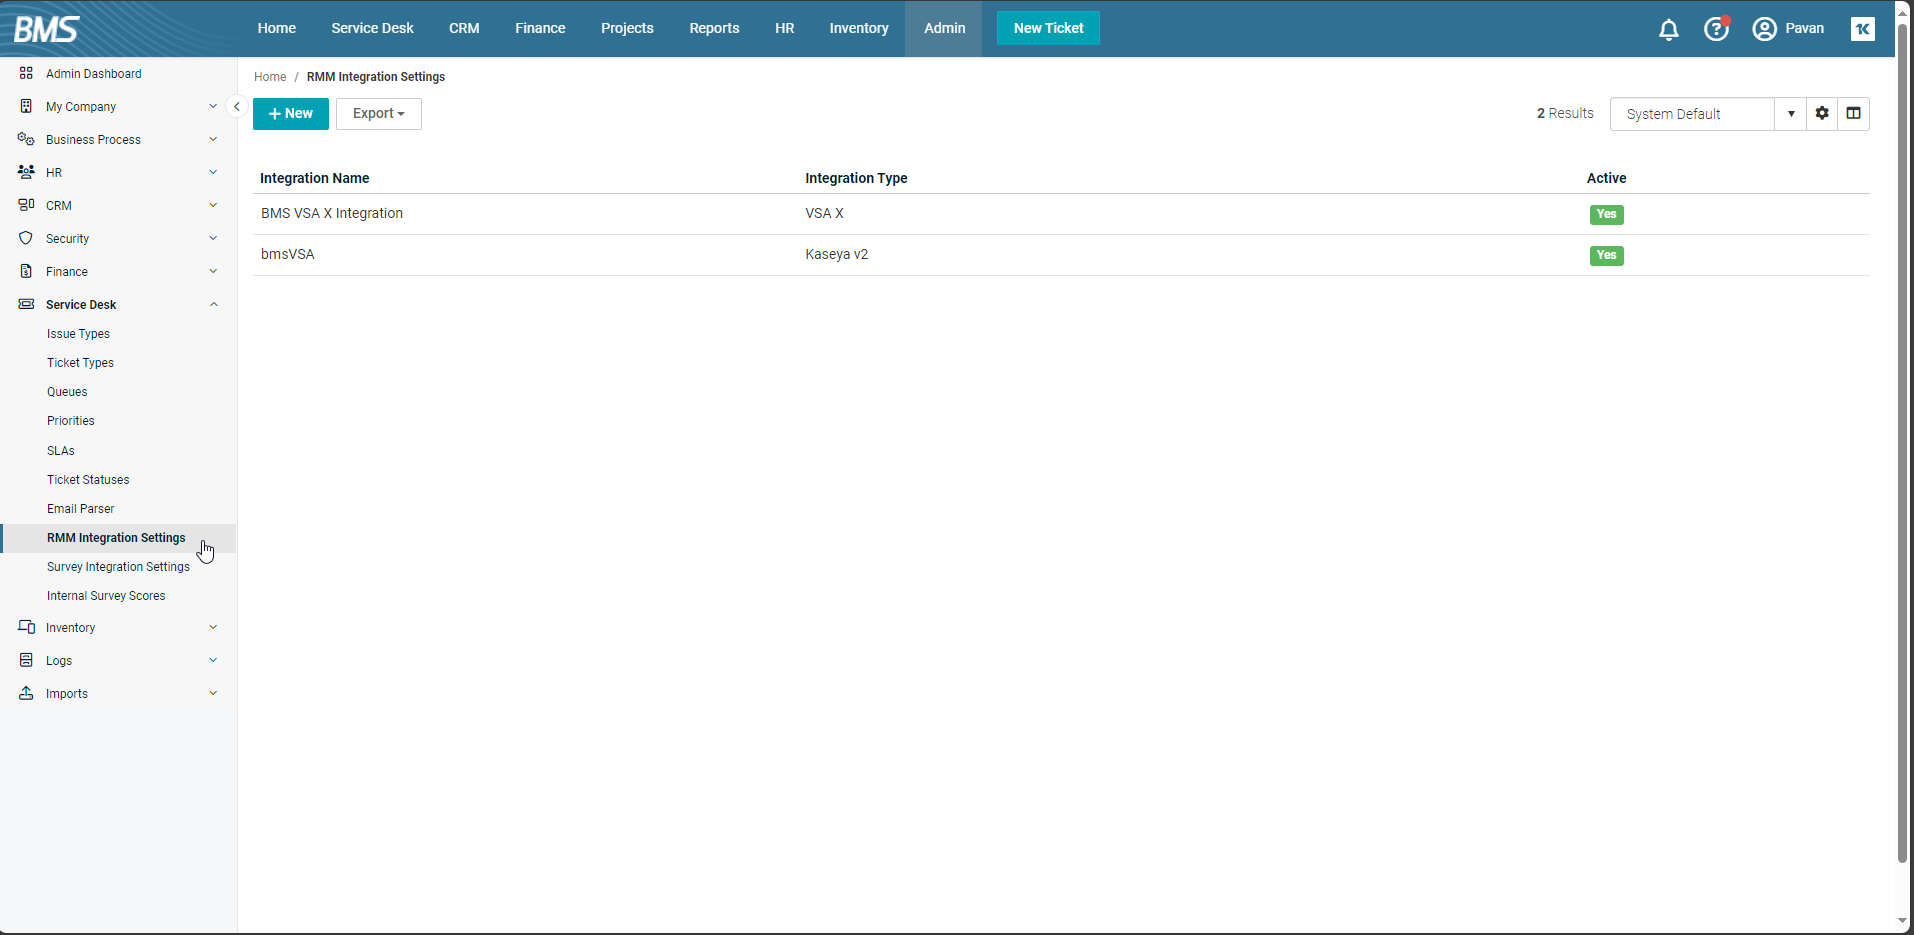
Go to BMS > Admin > Service Desk > RMM Integration Settings.
-
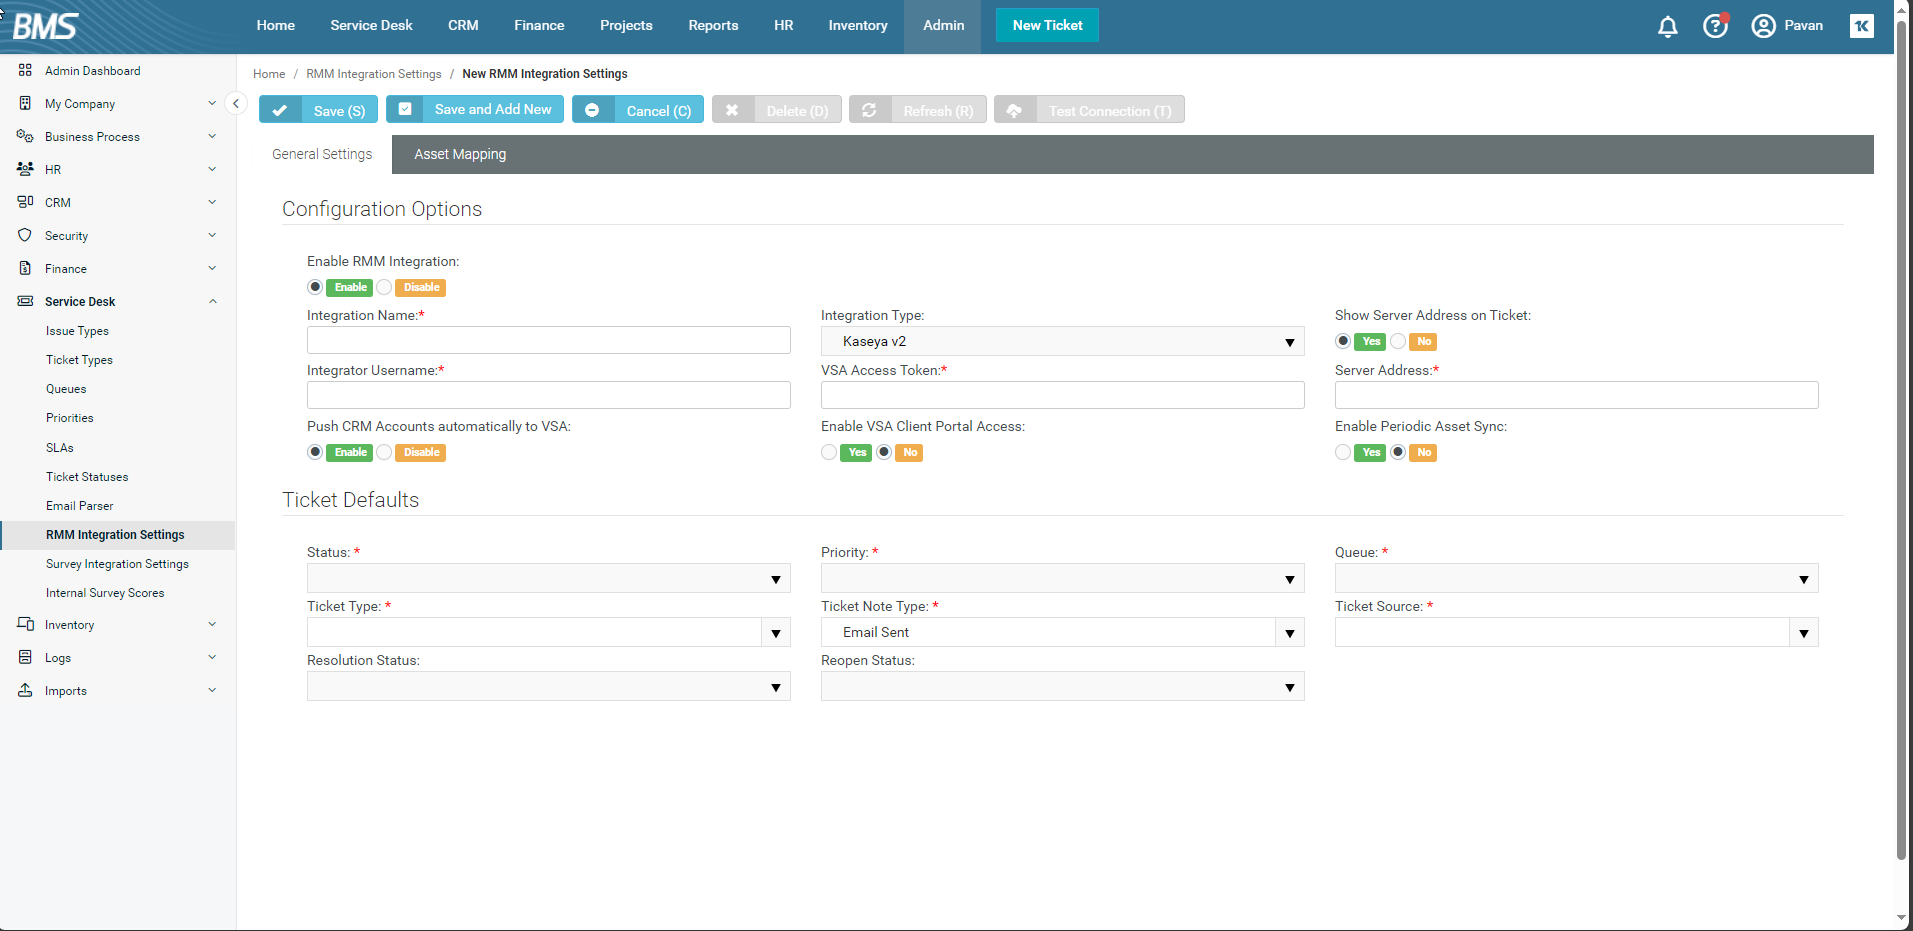
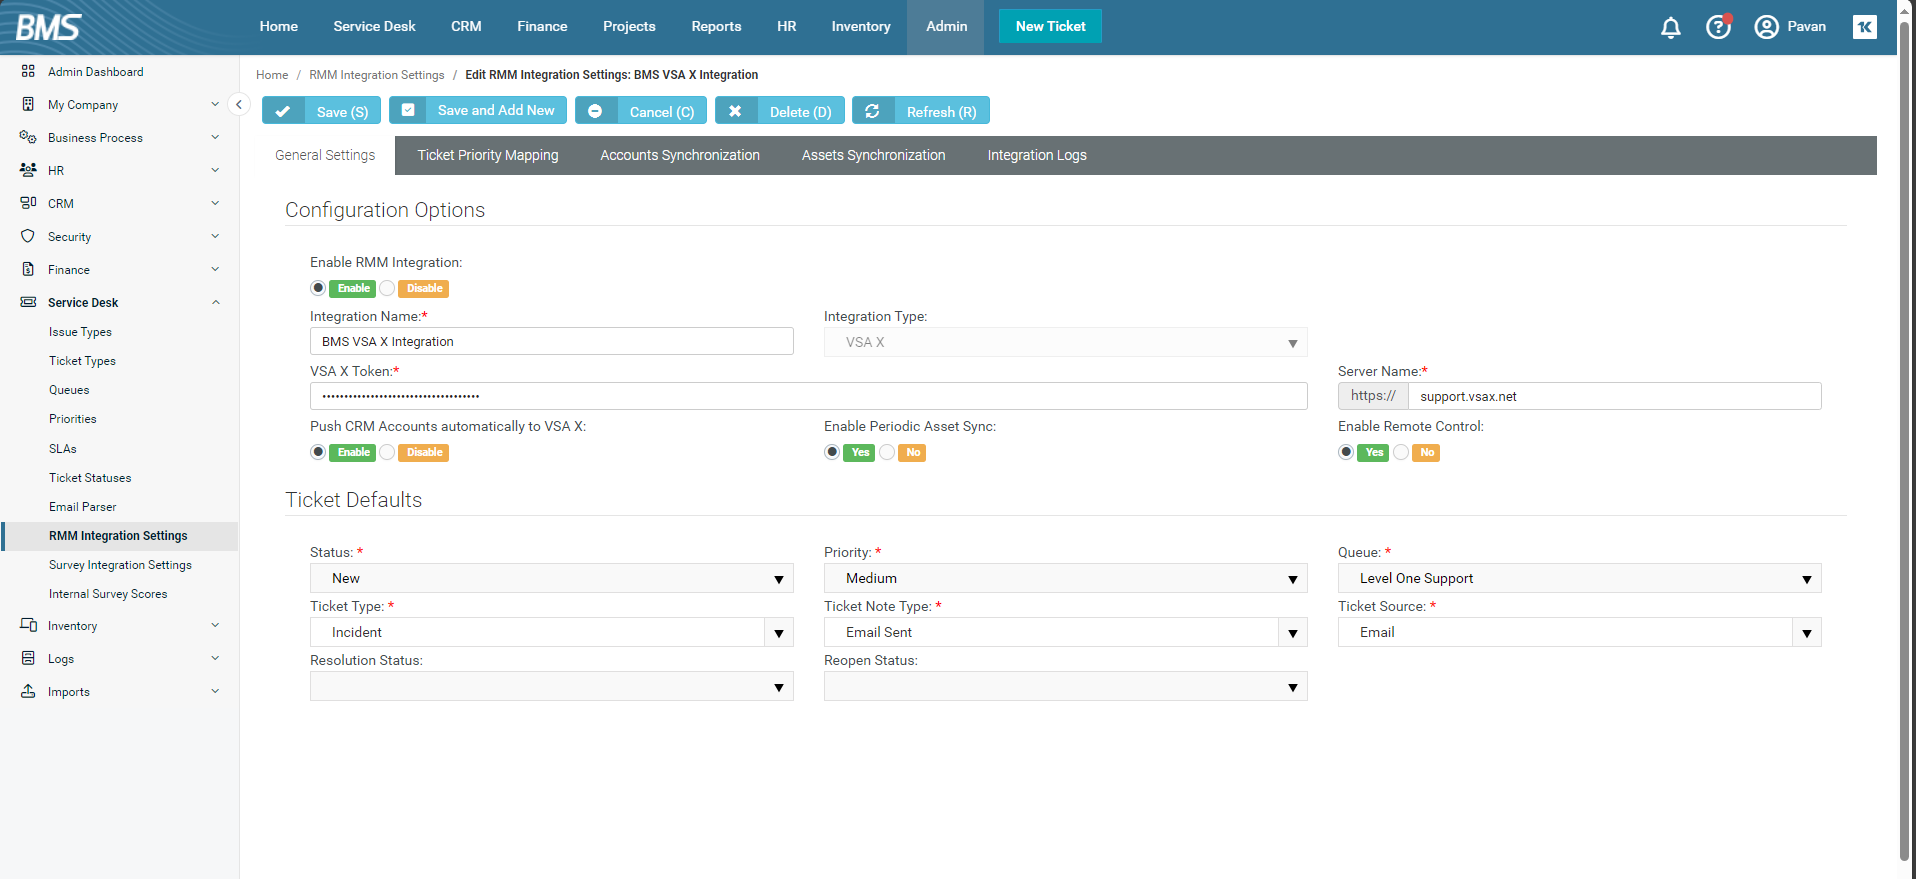
Click New. A page opens with two tabs - General Settings and Asset Mapping, General Settings being the default open tab.
-
Under RMM Integration, the Enable button is selected by default. Leave it as it is.
-
Integration Name: Enter an appropriate integration name.
-
Integration Type: Select VSA 10 from the dropdown.
-
VSA 10 Token: Paste the token that you had copied from the VSA app > BMS Integration page earlier.
-
Under Push CRM Accounts automatically to VSA 10, click Enable.
-
Under Enable Periodic Asset Sync, click Yes.
-
In the Ticket Defaults section, do the following:
-
Status: Select the appropriate option from the dropdown.
-
Priority: Select the appropriate option from the dropdown.
-
Queue: Select the appropriate option from the dropdown.
-
Ticket Type: Select the appropriate option from the dropdown.
-
Ticket Source: Select the appropriate option from the dropdown.
-
Server Name: Enter your VSA 10 instance name. This will be in the xxxxxx.vsax.net format. Enable Remote Control should be set to Yes.
-
-
Click Save. You will see a success message displayed on the top.
-
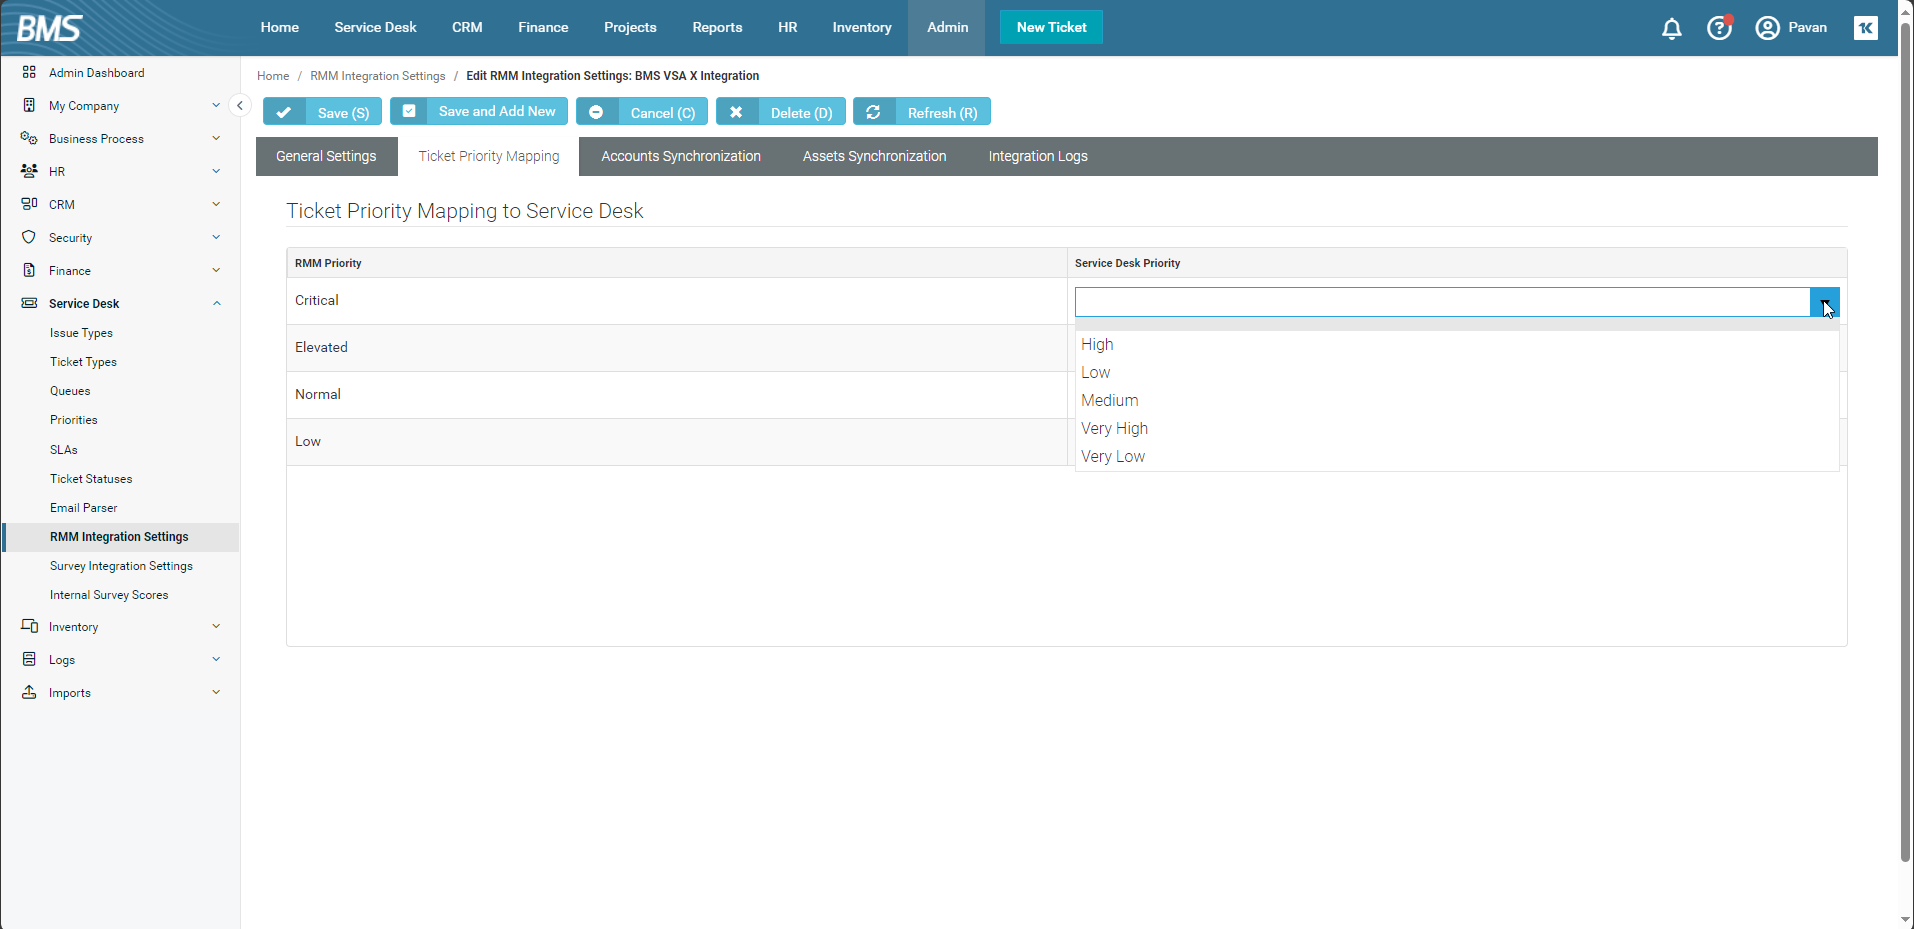
Once you save the integration, you will see four tabs - Ticket Priority Mapping, Accounts Synchronization, Assets Synchronization, and Integration Logs.
-
Go to Ticket Priority Mapping tab.
-
For each of the priorities on the left, select a Service Desk Priority from the dropdowns on the right. Notifications created in VSA 10 will trigger ticket creation based on what you define here.
-
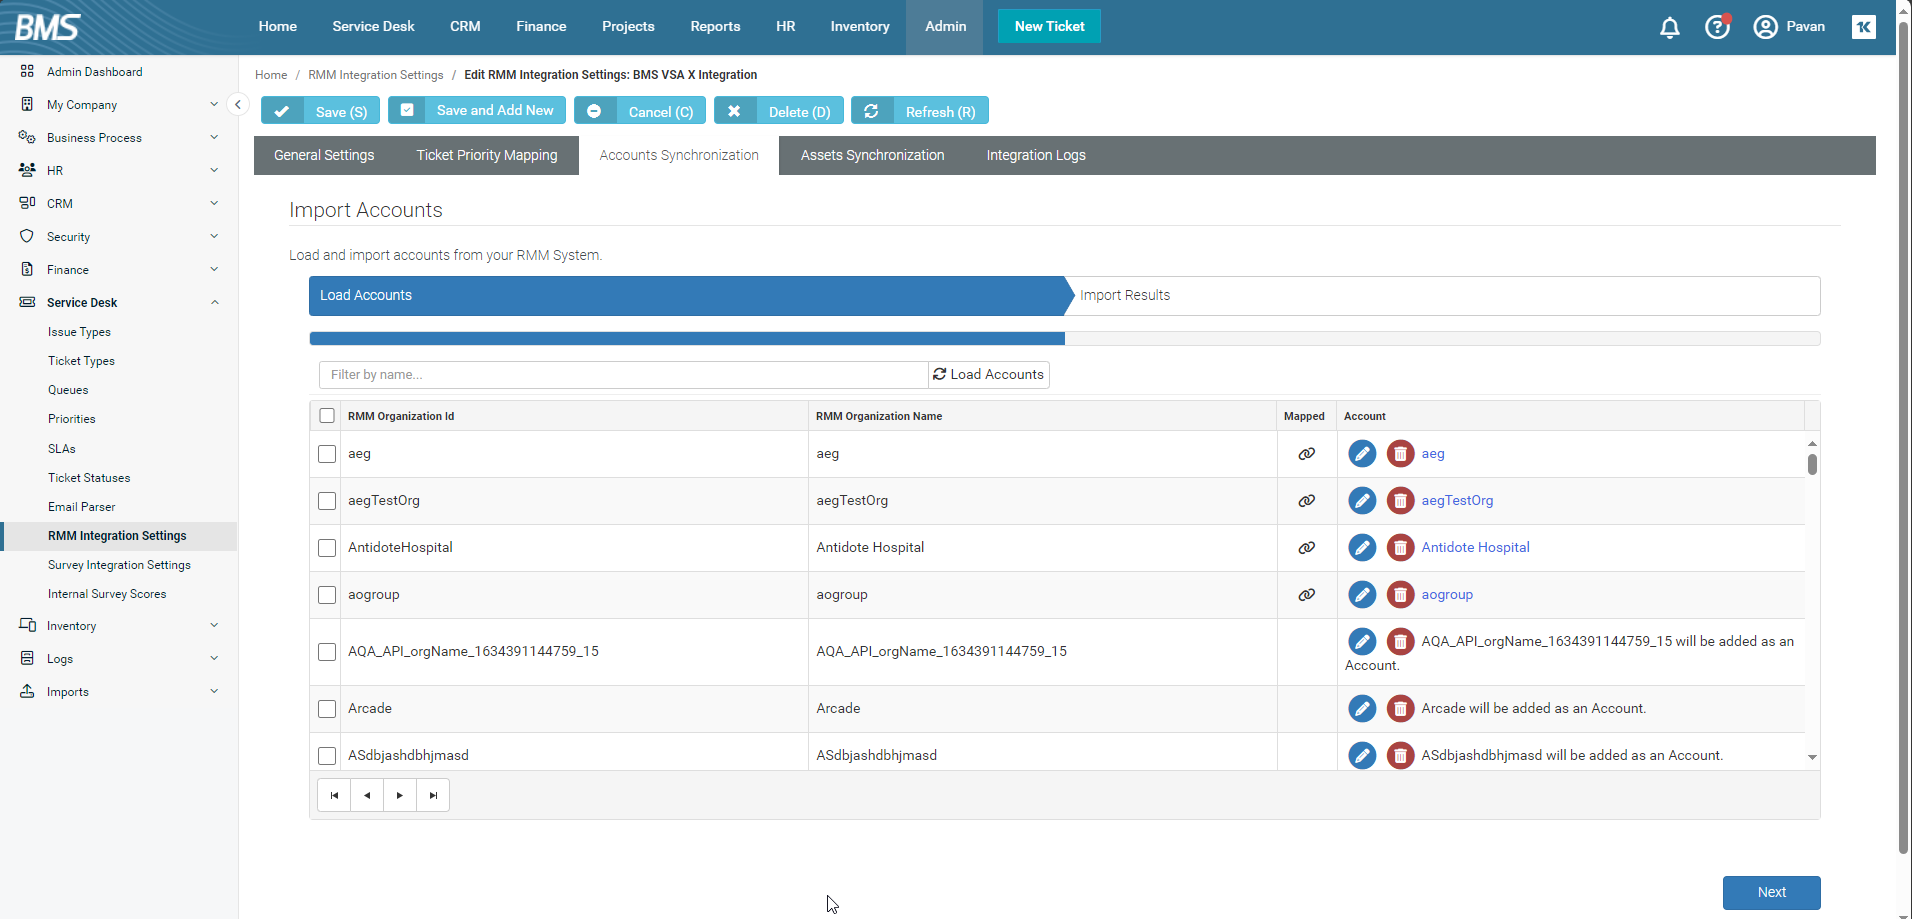
Go to Accounts Synchronization tab.
-
By default, all accounts will appear here. You should map them one by one.
-
Check the box at the left most end of the account. Repeat the process for each account.
-
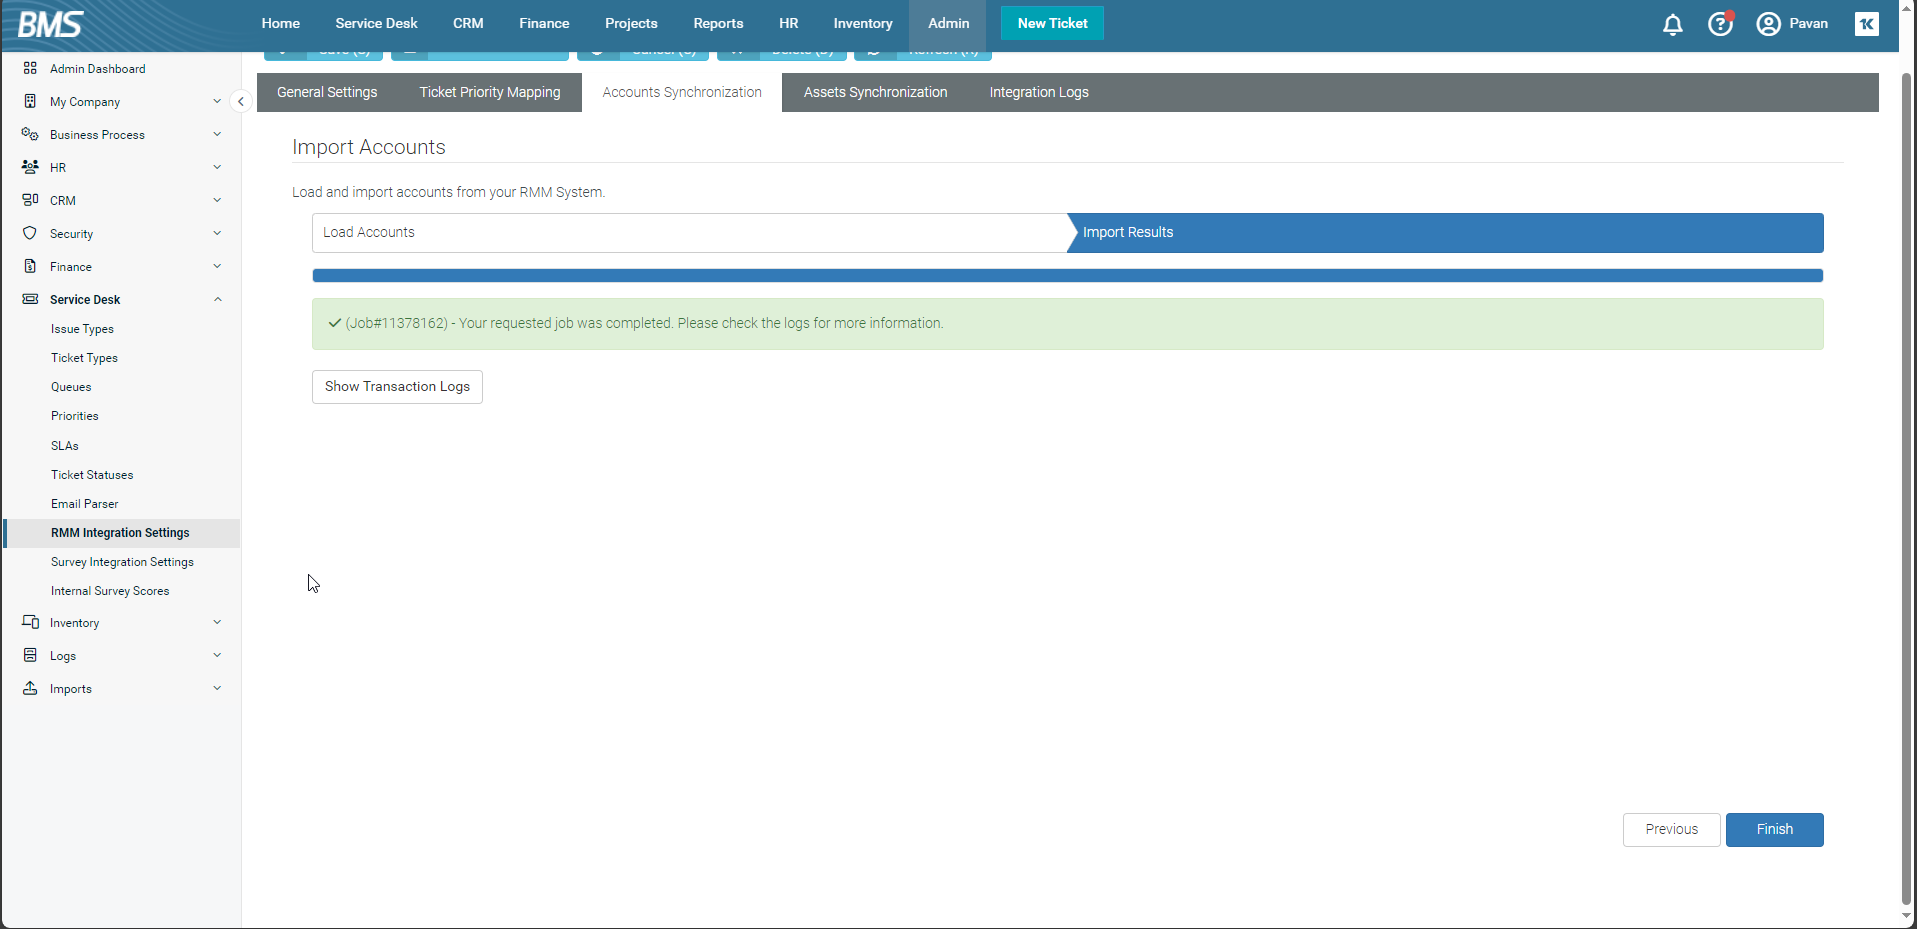
Click Next. You will see a green success message under the Import Results tab.
-
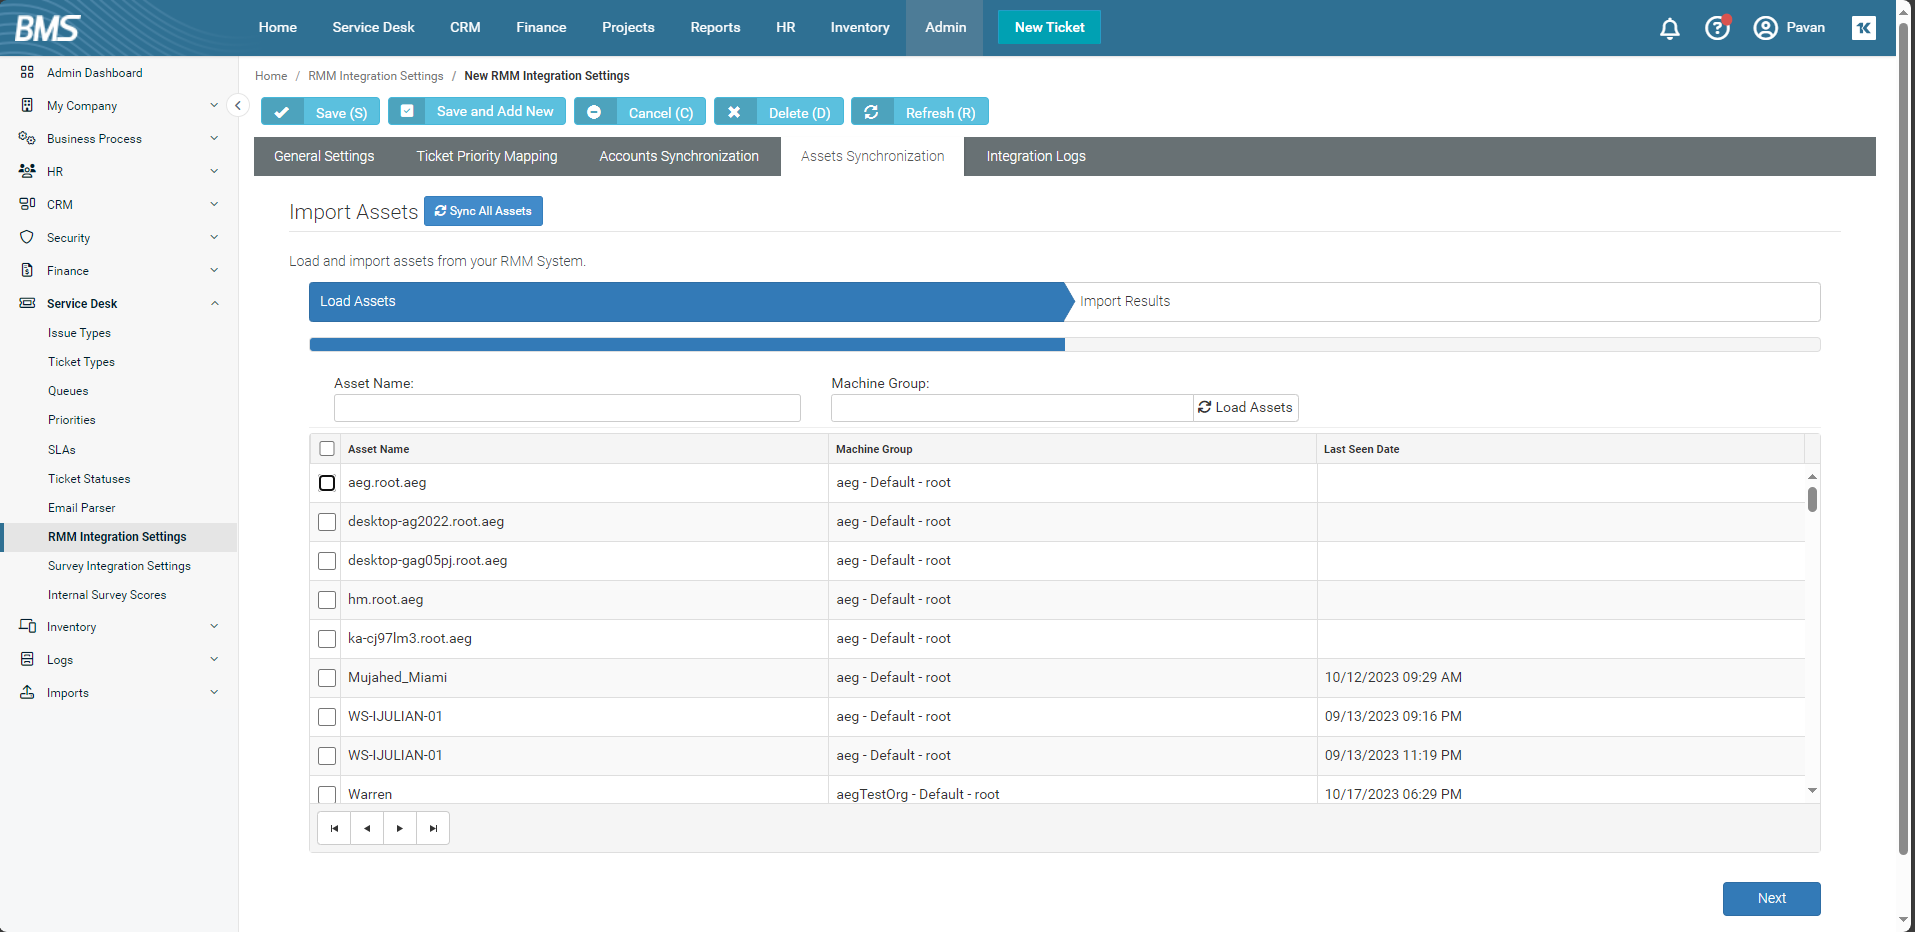
Next, go to Assets Synchronization tab.
-
By default, all assets will appear here. You can map them one by one or sync them all.
-
Check the box at the left most end of the account. Repeat the process for each account. Alternatively, you can check the box next to Asset Name and click Sync All Assets to sync them all at once.
-
Click Next. You will see a green success message under the Import Results tab.
-
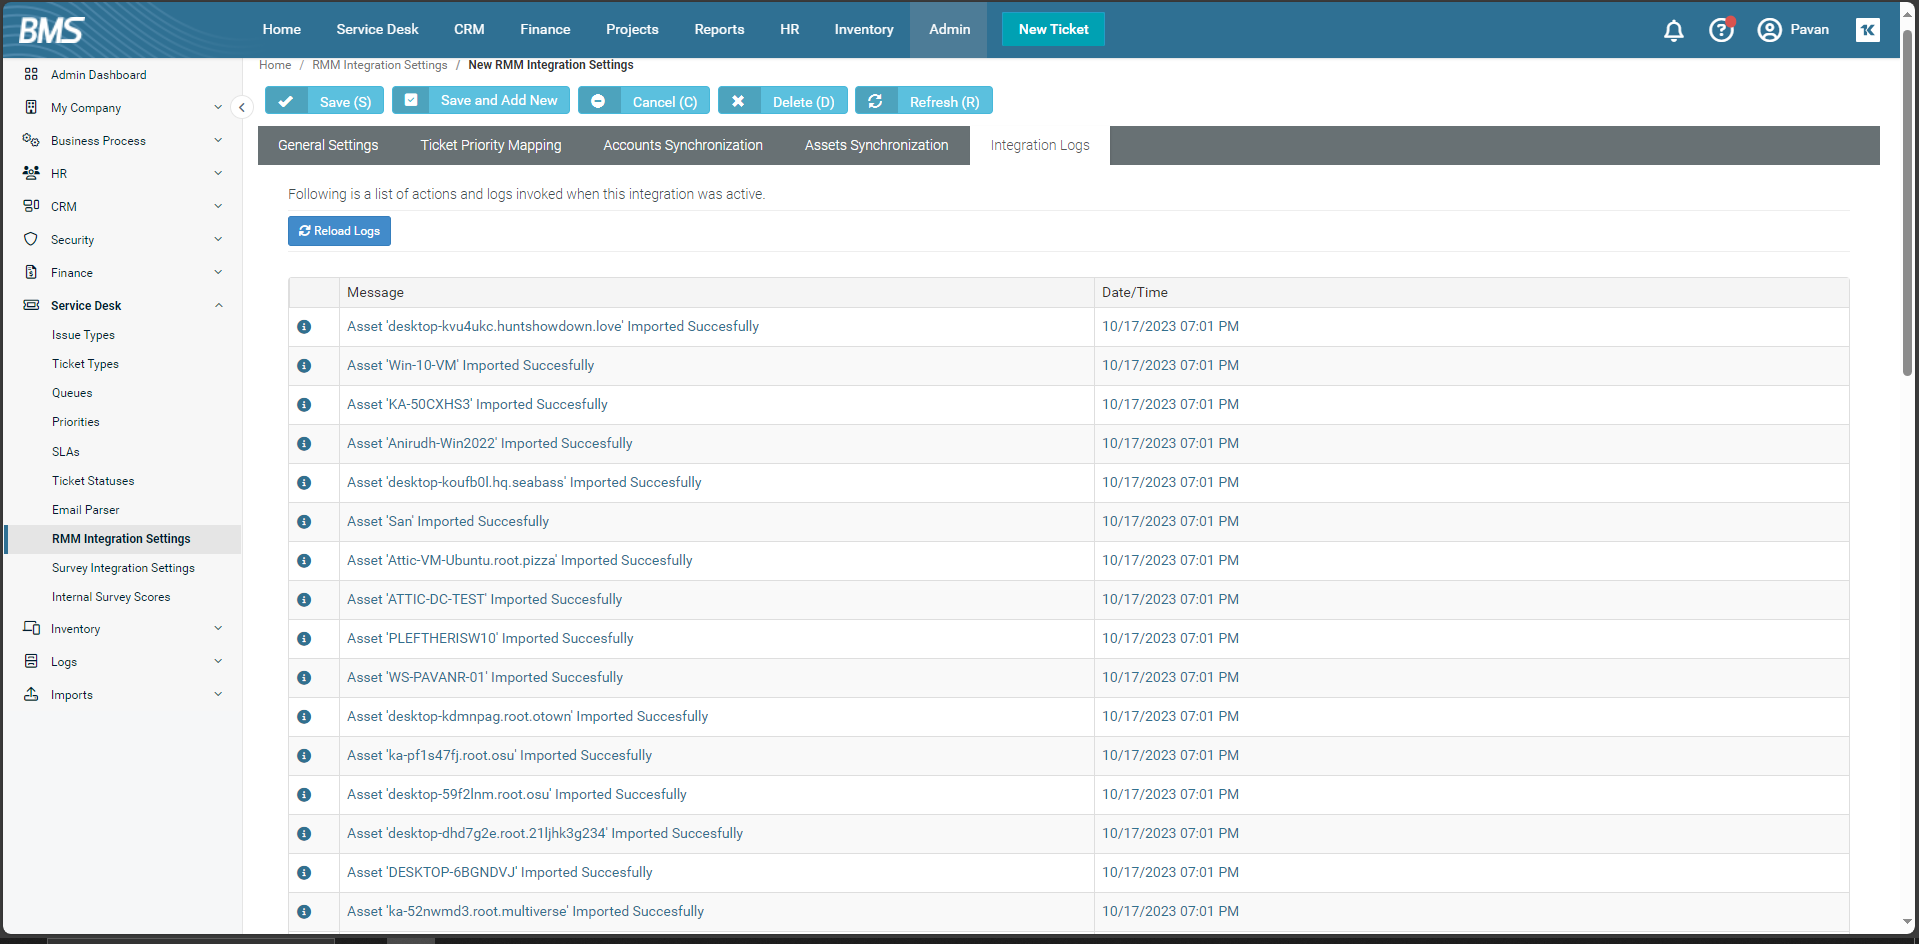
You can check the logs under Integration Logs tab.